
Winter Camping Guide for 2024
What features should I look for in a winter camping tent?
When choosing a tent for winter camping, look for the following key features:
- Strong, durable poles: Aluminum or carbon fiber poles provide the strength needed to withstand heavy snow loads and high winds. Avoid fiberglass poles which can shatter in cold temperatures
.2
- Double-wall construction: A double-wall tent has a separate rainfly which provides better insulation and helps minimize condensation buildup inside the tent
.7
- Full coverage rainfly: Look for a tent with a rainfly that extends close to the ground to block out wind and blowing snow
.3
- Sturdy, reinforced stakes and guylines: Industrial strength stakes and guylines are essential for anchoring the tent securely in snow and frozen ground
.3
- Ample ventilation: Vents and breathable fabric help reduce condensation which can be a major issue in winter. Look for tents with multiple venting options
.6
- Sufficient space: Make sure the tent has enough room for you and your gear. A vestibule area for storing gear and cooking is also very useful in winter
.4
- Easy setup: Practice setting up the tent at home to ensure you can do it quickly in cold, windy conditions with gloves on
.5
With a tent that has these features, you'll be well prepared for the rigors and challenges of winter camping. Remember, a high-quality 4-season tent is an investment that will keep you protected and comfortable in extreme conditions.
Can I use a 3-season tent for winter camping?
In some cases, a 3-season tent can be used for winter camping if you have the right gear and take some precautions. Here's what you need to know:
- Tent poles: Make sure your 3-season tent uses aluminum or carbon fiber poles, not fiberglass. Fiberglass can shatter in cold temperatures
.3
- Tent anchors: Use sturdy snow stakes, skis, ice axes, or "deadman" anchors to secure the tent. Regular stakes won't work in snow and frozen ground
.3
- Insulation: Bring a warm enough sleeping bag and pad to compensate for the lack of insulation in a 3-season tent. A sleeping pad with an R-value of 5+ is recommended for winter
.3
- Site selection: Pitch your tent in a spot sheltered from wind, like below treeline in a forested area. Build a snow wall around the tent for added wind protection
.3
- Ventilation: Keep vents partially open to minimize condensation buildup, even if it means sacrificing some warmth
.3
- Snow load: Be prepared to remove snow from the tent roof regularly to prevent collapse. Most 3-season tents can only support a small amount of snow
.1
- Psychological factors: Winter camping in a 3-season tent can be uncomfortable and less secure feeling. Make sure you're experienced with your gear and prepared for the conditions
.3
While it's possible to use a 3-season tent, a 4-season tent is the safest and best option for winter camping. If you anticipate camping regularly in full winter conditions, it's worth investing in a dedicated 4-season tent designed to handle the snow, wind and cold temperatures.
How do I properly set up a tent for winter conditions?
Setting up a tent in winter requires some special techniques to ensure it's stable, secure and able to withstand harsh conditions. Here are the key steps:
- Choose a good site: Look for a spot that's sheltered from wind, like a forested area below treeline. Avoid setting up in avalanche paths or under snow-laden trees
.3
- Pack down the snow: Use skis or snowshoes to pack down the snow where you'll pitch the tent. This creates a firm foundation and prevents the tent from sinking
.4
- Create a wind break: Dig a shallow pit or build a snow wall on the windward side of the tent to block wind and drifting snow
.3
- Stake it out: Use sturdy snow stakes, skis, ice axes, or "deadman" anchors (like stuff sacks filled with snow) to guy out the tent. Bury the anchors deep in the snow so they freeze in place
.3
- Ventilate: Keep at least two vents partially open on opposite sides of the tent to promote airflow and minimize condensation buildup
.2
- Manage snow load: Remove snow from the tent roof regularly to prevent sagging and collapse. Use a tent brush or your hands to gently clear snow
.1
- Vestibule space: If your tent has a vestibule, use it to store gear and cook. This keeps the inside of the tent dry and maximizes living space
.4
- Insulate the floor: Use a ground sheet and foam sleeping pads to insulate the tent floor from the cold ground
.6
With proper site selection, anchoring, and snow management, your tent will be a stable and secure shelter in winter conditions. Be sure to practice these techniques at home before using them in the backcountry.
What are the best tents for extreme cold weather?
When camping in extreme cold, you need a tent that's specifically designed to withstand harsh winter conditions. Here are some of the best 4-season tents for frigid temperatures:
- Black Diamond Eldorado: This single-wall mountaineering tent is built for high-altitude alpine conditions. It has a sturdy two-pole design and is made with ToddTex waterproof-breathable fabric
.7
4.76 out of 5 stars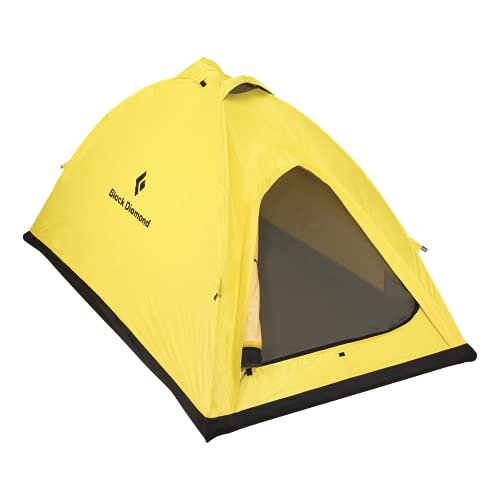
Black Diamond Eldorado Yellow Tent for Camping
Perfect for your outdoor adventures, the Black Diamond Eldorado Yellow Tent for Camping offers durability and reliability in a compact design
Product information
Product Review Score
Product links
- Mountain Hardwear Trango 3: A classic double-wall mountaineering tent that can handle heavy snow loads and high winds. It has a strong six-pole design and a large vestibule for gear storage
.7
4.68 out of 5 stars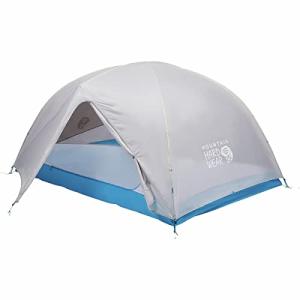
Mountain Hardwear Aspect 3 Tent - Grey Ice
Spacious and durable tent perfect for your camping adventures in the great outdoors
Product information
Product Review Score
Product links
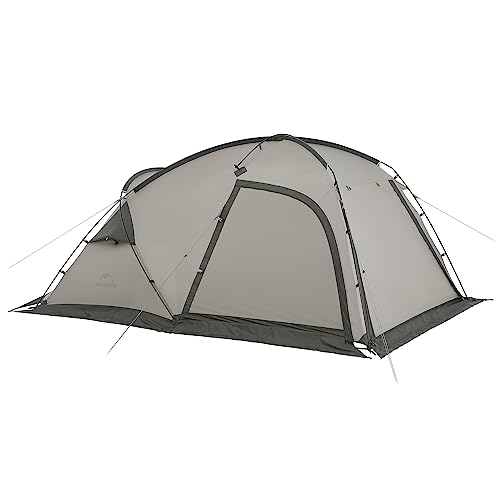
- The North Face Wawona: This double-wall tent is designed for harsh winter conditions at base camp. It has a robust five-pole structure, a large vestibule, and a cold-weather PU port for ventilation
.7
4.13 out of 5 stars
North Face Wawona 6-Person Tent, Green/Grey, One Size
Spacious and reliable tent for your family camping adventures
Product information
Product Review Score
Product links
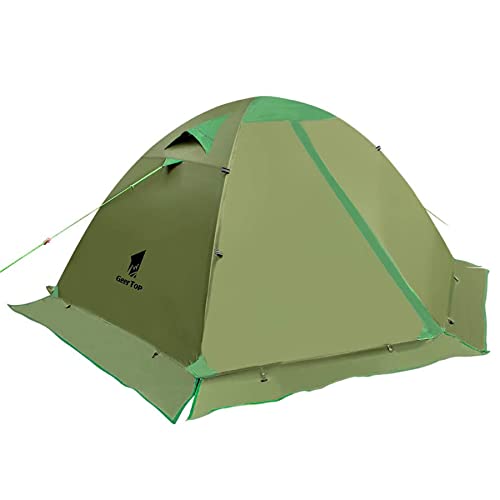
- Geertop Ultralight: A lightweight double-wall tent built for extreme weather in all seasons. It has a strong two-pole dome design, a large vestibule, and an integrated snow skirt
.7
$145.99
$117.99
4.24 out of 5 stars
GEERTOP Lightweight 2 Person All-Season Camping Tent
Your Home Away from Home in the Great Outdoors
Product information
Product Review Score
Product links
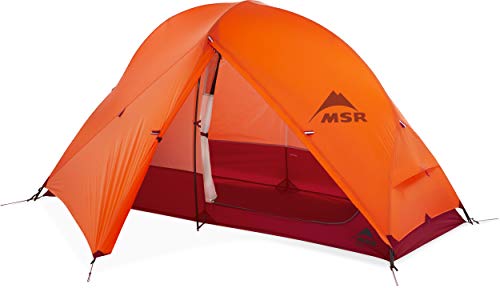
- MSR Access 3: A lighter weight double-wall tent designed for backcountry skiing and snowshoeing. It has a sturdy central-support frame and a large vestibule for gear storage
.2
$799.95
$513.54
4.33 out of 5 stars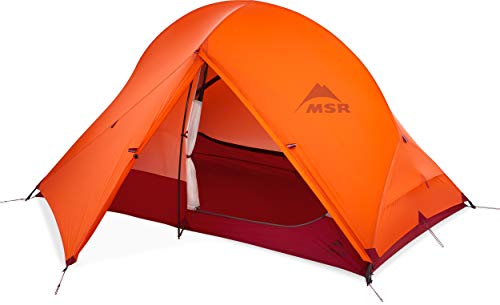
MSR Access 2 Person 4-Season Lightweight Tent
Stay comfortable and protected in the great outdoors with the MSR Access 2 Person 4-Season Lightweight Tent
Product information
Product Review Score
Product links
When choosing an extreme cold weather tent, look for these key features:
- Strong aluminum or carbon fiber poles
- Reinforced pole joints and guy-out points
- Waterproof-breathable fabric with a high denier count
- Large vestibules for gear storage and cooking
- Vents that can be closed in harsh conditions
- Integrated snow skirts or flaps to block wind and snow
Remember, an extreme cold weather tent is an investment in your safety and comfort. Choose a high-quality, durable tent from a reputable brand, and be sure to practice setting it up before heading out into the backcountry.
How do I prevent condensation inside my tent in winter?
Condensation can be a major problem in winter tents, leading to wet gear, dampness, and discomfort. Here are some tips to minimize condensation buildup:
- Ventilate: Keep at least two vents partially open on opposite sides of the tent, even in cold weather. This allows moist air to escape and promotes airflow
.2
- Use a double-wall tent: Double-wall tents have a separate breathable inner tent and waterproof rainfly. This design allows moisture to pass through the inner tent and condense on the rainfly, away from your living space
.7
- Avoid bringing snow inside: Brush off snow from your gear and clothes before entering the tent. Snow brought inside will melt and increase humidity
.4
- Cook outside: Use a vestibule or cook away from the tent to prevent moisture from cooking from building up inside
.3
- Dry out gear: If your gear does get wet, dry it out during the day in the sun and wind if possible. Use a small towel to wipe down the tent walls
.6
- Use a ground cloth: A waterproof ground cloth under the tent helps prevent moisture from the ground from seeping into the tent
.4
- Avoid breathing into your sleeping bag: Breathe outside your sleeping bag to prevent moisture from your breath from collecting inside
.3
- Choose a good campsite: Avoid camping in low-lying areas where cold air and moisture can collect. Look for sites with good drainage and air flow
.4
Remember, some condensation is inevitable in cold weather, especially in single-wall tents. The key is to minimize it as much as possible through ventilation and moisture control. With proper techniques, you can keep your winter tent dry and comfortable.
What additional gear do I need for winter tent camping?
In addition to a 4-season tent, there are several key pieces of gear you'll need for safe and comfortable winter camping:
- Warm sleeping bag: Choose a sleeping bag rated at least 10°F lower than the coldest temperature you expect to encounter. Down bags are lightweight and compressible, but synthetic bags are better if moisture is a concern
.4
- Insulated sleeping pad: A sleeping pad with an R-value of 5 or higher is essential for insulating you from the cold ground. Foam pads, self-inflating pads, and air pads are all good options
.3
- Stove and fuel: A liquid fuel stove performs best in cold weather. White gas and kerosene are good fuel options. Bring extra fuel for melting snow for water
.6
- Cookware and utensils: Bring a sturdy pot for melting snow and boiling water, plus a mug and spoon. A heat exchanger pot is most efficient
.4
- Avalanche safety gear: If you're camping in avalanche terrain, bring an avalanche beacon, probe, and shovel, and know how to use them
.3
- Snow shovel: A sturdy shovel is essential for digging out tent sites, building snow walls, and avalanche rescue
.3
- Foam sit pad: A closed-cell foam pad to sit on while cooking or hanging out in camp is worth its weight in gold on a cold winter night
.3
- Extra stakes and guylines: Bring extra stakes and guylines for anchoring your tent in deep snow and securing your rainfly
.1
- Warm clothing and accessories: Bring plenty of warm, layered clothing, including a puffy jacket, insulated pants, gloves, hat, and boots. Don't forget sunglasses and sunscreen for bright snow conditions
.4
- Headlamp and extra batteries: A headlamp is essential for navigating and doing camp chores in the dark. Cold weather can drain batteries quickly, so bring extras
.6
With the right gear, you can stay warm, dry, and safe while enjoying the beauty and solitude of winter camping. Remember to test your gear and practice using it before heading out on a backcountry trip.
What are the best ways to anchor a tent in snow or frozen ground?
Anchoring a tent securely is crucial for stability and safety in winter conditions. Here are the best methods for staking out your shelter in snow and frozen earth:
Use Specialized Snow Stakes
Snow stakes
Snow stakes are wider, longer, and stronger than regular tent stakes. They provide more surface area for gripping in soft snow. Look for stakes made of lightweight, durable aluminum or titanium. Curved cross-section designs like the MSR Blizzard stake offer the best holding power. Drive them in at 45-degree angles for maximum strength.
Create Deadman Anchors
A deadman anchor is an object buried in the snow horizontally, with a guyline attached for anchoring.
To make one:
- Fill a stuff sack with snow
- Bury it at least 1 foot deep
- Attach your guyline to the sack
- Cover with more snow and let it freeze in place
Skis, snowshoes, ice axes, and branches also work well. Experiment with different objects to see what works best.
Use Skis or Snowshoes
Your skis or snowshoes make quick, effective anchors in a pinch. Bury them vertically in the snow, with just the tips protruding. Wrap a guyline around the tip in a clove hitch, then secure the other end to your tent with a trucker's hitch. The wide surface area provides excellent holding power in soft snow.
Try Ice Screws
For pitching on ice or hard-packed snow, use ice screws like those made for climbing. Screw them in at 45-degree angles, leaving just enough of the hanger exposed to attach a carabiner and guyline. Ice screws are the most secure anchors for frozen terrain, but can be overkill for most winter camping.
Bury Anchors in Freezing Slush
If you have running water nearby, you can create super strong anchors using slush. Dig a hole, fill it with water, bury your deadman anchor or stake, then let it freeze solid. It takes some time, but will result in bombproof anchoring for an extended stay.By using specialized snow stakes, deadman anchors, skis, and ice screws, you can secure your tent in even the most challenging winter conditions. Always stake out all guy-out points and use proper tensioning for maximum stability. With practice, you'll be pitching your fortress confidently in the frozen wilds.
What are some tips for staying warm in a tent in winter?
Staying warm inside your tent in winter conditions requires proper insulation, moisture management, and heat retention techniques:
- Use an insulated sleeping pad: An insulated sleeping pad with a high R-value (5+) is crucial for preventing heat loss to the cold ground.
- Wear dry base layers: Sleep in clean, dry base layer clothing made of moisture-wicking synthetic or merino wool. Avoid cotton which absorbs moisture.
- Use a warm sleeping bag: Choose a sleeping bag rated for temperatures much lower than you expect. Down bags insulate better than synthetic for dry conditions.
- Eat a high-calorie dinner: Having a warm meal with complex carbs and fats before bed provides your body with fuel to generate heat overnight.
- Use a hot water bottle: Fill a Nalgene or sturdy bottle with boiling water and place it in your sleeping bag before bed. It provides hours of radiant heat.
- Wear a warm hat: You lose a lot of body heat through your head. Wear an insulated hat or balaclava to bed.
- Do light exercises: Low-impact exercises like jumping jacks before bed get your blood circulating and raise your body temperature.
- Minimize moisture buildup: Vent your tent, remove wet layers, and cook outside the tent to prevent condensation which makes you feel colder.
- Use a tent footprint or ground cloth: An impermeable barrier under your tent floor prevents heat loss into the ground.
- Huddle for warmth: If camping with a partner, you can spoon or lay head-to-toe to share body heat.
Staying hydrated and fueling your body with calorie-dense foods also helps maintain your internal furnace. With proper insulation and heat management, you can remain toasty warm even on the coldest winter nights.
How do I store my tent after winter camping?
Proper storage of your tent after a winter camping trip is essential to prevent mold, mildew, and damage that can shorten its lifespan. Follow these steps:
- Clean the tent thoroughly: Brush off any dirt, debris or leftover snow from the tent body, rainfly and poles. Use a soft brush and mild soap if needed.
- Dry it completely: Set up the tent indoors or in a shaded area and allow it to fully dry before storing. Any moisture left can lead to mildew.
- Remove the poles: Disassemble the poles and wipe them down. Check for any hairline cracks or bends that may need repair.
- Stuff or fold loosely: Never store a tent tightly compressed. Stuff the body into its sack or fold it loosely to prevent creasing.
- Store in a cool, dry place: Heat and moisture can degrade tent fabrics and coatings. Store in a breathable sack or bin in a cool, dry location like a basement.
- Check for rodent protection: If storing long-term, use a rodent-proof bin or add mothballs to deter pests from nesting.
- Clean and lubricate zippers: Use a zipper lubricant or beeswax to keep zippers running smoothly.
- Check guy lines and stakes: Replace any frayed guy lines or bent stakes before your next trip.
- Note any repairs needed: Make a list of any holes, tears or other damage that needs repair before next season.
- Consider professional cleaning: For very dirty or smelly tents, you may want to use a professional gear cleaning service.
With proper cleaning and storage, a quality tent can last for many winter camping seasons. Taking the time to care for your tent ensures you'll have a warm, dry shelter on your next cold weather adventure.
What are the differences between 4-season and 3-season tents?
The main differences between 4-season and 3-season tents lie in their construction, strength, and ability to withstand harsh winter conditions:4-Season Tents:
- Designed for use year-round, including winter conditions
- Stronger, more durable fabrics and poles to handle heavy snow loads
- More poles and guy-out points for increased structural stability
- Lower profile, aerodynamic designs to shed wind
- Rounded dome shapes to prevent snow buildup
- Extended rainfly coverage down to the ground
- Fewer and smaller mesh panels to retain warmth
- Integrated snow skirts or vestibules
- Designed for ventilation to reduce condensation buildup
3-Season Tents:
- Intended for spring, summer, and fall use only
- Lighter weight fabrics and poles
- Fewer poles and guy-out points
- Taller, less aerodynamic shapes
- More mesh panels for warm weather ventilation
- Partial or no-coverage rainflies
- No snow skirts or vestibules
- Not designed to handle heavy snow loads
In general, 4-season tents prioritize strength, warmth retention, and resistance to wind and snow accumulation over light weight. 3-season models focus on ventilation, light weight, and ease of setup.Some key advantages of 4-season tents:
- Can handle severe winter storms safely
- Warmer due to less mesh ventilation
- More strength from extra poles/guy-outs
- Extended vestibules for gear storage
However, 4-season tents are typically:
- Heavier than 3-season models
- More expensive
- More complex to pitch
- Worse ventilation in warm conditions
For winter camping, a 4-season tent provides crucial strength and warmth. But a 3-season can work for cooler weather if you take precautions. Choose your tent based on the conditions you'll encounter.